Log into the dialer by clicking here and enter your log in information as provided in your Getting Started Guide email.
Step #1 Time Zone Setting:
- From the top right click on your name
- Choose Profile and set your current Time Zone for message delivery and reporting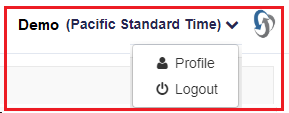
Step #2 Create a Contact Group: (this will be where you upload your contacts too)
- From the Menu Bar select Contact Manager > Groups
- Click on Add Group
- Name your Group
Staff drop down only available if you have multiple users on the account.
Step #3 Add Contacts to the Group
- From the Action column Select Import Contacts
- Choose your CSV file and Select Submit
- Map the column header drop downs with the correct data in your file

Step #4 Add Voice Template (audio to be played to callers)
- Select Templates from the Voice menu
- Select Add Voice Template
- For surveys you will need to record 2 message 1st message instruct caller what key to press to begin the survey. 2nd message would be the message you want to leave on the voicemail if you want to leave a voicemail message also.
- Add your Voice Message
Choose an audio recording type or type the text to be spoken

Step #5 Send Group Message
- Click Quick Message from the navigation bar on the left.
- Give your Campaign a Name and select the Caller ID to be displayed.
- In the To: field type in the number or Contact Group name.
- Next choose a pre defined Voice Message template.
- Next select the day and time for your message to be sent
- Set the MPH (Messages Per Hour) high enough to deliver your message during the hours you have set.
Example: 1000 contacts / 10 hrs = 100 MPH
- Click Send YOUR DONE!

